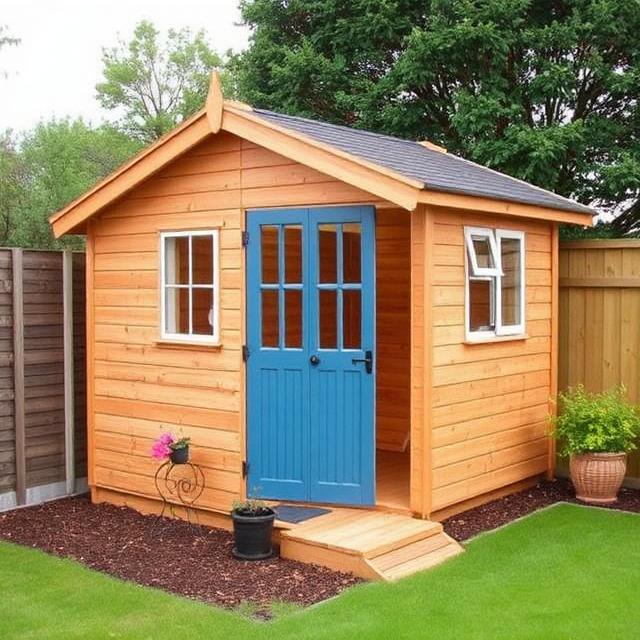
Why A Shed Base Is So Important In The UK
The base will do more than support weight; it will protect the shed both from moisture and ground movement. Due to factors like bad weather, soil in the UK normally stays damp for a long time. Sheds placed directly on either grass or soil will mostly rot from below.
A good base allows for drainage. It also allows the shed to stay level, which is important because if a shed tilts, it can cause doors and panels to warp. Even a cheap shed base can extend life expectancy for many years.
The other main reason is safety. An unstable shed might shift when strong winds come. A solid base reduces this risk. Thus, investing time in the base saves money later.
Key Things To Know Before A Beginner Builds a Cheap Shed Base
Before choosing a base type, some basics matter. First, measure the shed accurately; the base should be the size of the shed, not larger. Second, check local ground conditions. For example, clay soil needs better drainage.
Third think about access. You want room to work and maneuver materials. Finally, think about long term usage. A light garden tool shed will require less support than a heavy storage shed.
Leveling is often overlooked, especially by beginners. However, it is a really important step. Always use a spirit level. Gently adjust shed bases so the surface is flat; this one simple step avoids so many future problems.
Gravel Shed Base For Beginners
Why Gravel Is A Popular Cheap Shed Base
Gravel is certainly one of the most popular options available in the UK. It isn’t particularly expensive and it’s easy to lay down a suitable surface. As well as this, the water drains through effectively, which is very important during wet weather. Because of this reason, it works well on most the garden sheds.
Another advantage is the flexibility it offers. Shed bases have easy adjustments that are done by addition or removal of gravel, making it ideal for beginners who may need small corrections.
How To Build A Simple Gravel Shed Base
Mark out the area for your shed first. Dig down about ten centimeters. Take away the grass and all soft soil. Then lay a weed membrane; it prevents the plants from growing through.
Then add hardcore or crushed stone. Compact as much as possible. Then add a layer of sharp gravel. Set it even. Check all sides with a spirit level. Don’t rush it here.
Finally, if required, top with paving slabs or a timber frame for extra stability. In general, gravel presents one of the strong balances of cost versus performance.
Shed Base Paving Slab For Small UK Gardens
Why Slabs Are Beginner Friendly
Paving slabs are widely available in the UK. They are easy to handle and affordable. Most DIY stores sell them at a low cost. Because of this, they are one of the most common cheap shed base options.
Slabs present a solid and flat surface area. This aids in evenly distributing the weight. They also reduce ground contact, hence protecting the floor of the shed.
Installation Basics Of Slabs
Prepare the ground as you would for gravel. Dig down and compact the soil. Add a thin layer of sand or mortar. Then set the slabs down carefully.
Put a level after each slab. The shed bases should be adjusted by light taps of the slabs with a rubber mallet. Allow no more than minimum gaps. Allow the base to set after finishing and place the shed.
Slabs work best for small to medium sheds. They are reliable and durable when installed correctly.
Timber Shed Base For Budget DIY Projects
When Timber Makes Sense
Sometimes, it is also ignored, but wooden bases can be quite effective. They are light and simple to put together. For a fresher, this is a big plus.
Pressure-treated timber resists rot. If slightly raised above ground, it allows airflow, helping the shed to stay dry.
How To Construct A Simple Timber Base
Construct a rectangular frame from treated timber. Ensure the corners are square. The frame should be placed on compacted gravel or concrete blocks. This keeps wood off the soil.
Install joists inside the frame for rigidity. Make sure they are even. Regularly check levels. If necessary, adjust the shed bases with the use of packers.
This type of base is ideal for gardens that are uneven. It also allows for future adjustments.
Concrete Block Shed Base Without Pouring Concrete
A Simple Alternative For Beginners
Concrete blocks offer strength without mixing cement. They are also so heavy and stable. Because of this, they are suitable for sheds that store tools or bikes.
Blocks are placed at key load points. This reduces material cost. It also speeds up installation.
Safety Use Of Concrete Blocks
Mark block positions on corners and down edges. Dig shallow holes to each block. Add sand or gravel underneath. Level each block carefully.
Place timber bearers or a shed frame on top. Check alignment again. This method allows airflow and drainage. It is a practical cheap shed base for beginners who want strength without complexity.
How to Adjust Shed Bases Correctly
The adjustment is something normal when installing a shed base, and beginners must not be in a hurry to complete this. The checking of levels must be done always after placing the materials. Just small changes can make big ones.
Use gravel, sand, or packers to fine tune height. Work slowly. Walk around the base and look from different angles. This helps spot uneven areas.
Ground can settle over time. It is wise to check the base after a few weeks. If needed, readjust shed bases again. This simple habit improves long-term stability.
Mistakes Beginners Must Avoid
Skipping preparation causes many problems. A common mistake is placing the shed directly on grass. The other mistake is not being concerned with drainage. When water pools under a shed, rot ensues.
Using untreated timber is also ill-advised. It does not last in UK conditions. Lastly, rushing the leveling process causes sticking of doors and crack panels.
With these mistakes avoided, shed bases can be built strongly yet at an affordable cost by beginners.
Conclusion
Building a shed base can be inexpensive and uncomplicated. With proper guidance, beginners can create reliable and affordable solutions that suit UK gardens. Gravel, slabs, timber, and concrete blocks-all practical options.
The key is in preparation, leveling, and drainage. Take time to measure and adjust shed bases properly; this will protect your shed and save money in the long run.
You select a beginner-friendly approach whereby you gain skills, confidence, and more importantly, you create a base that’s solid enough to withstand British weather and everyday use.
Frequently Asked Questions
1. What is the cheapest shed base option in the UK?
Gravel is generally the least expensive and most flexible for newcomers.
2. Can I put a shed directly on soil?
This should be avoided. The presence of moisture encourages the areas of rot and instability.
3. How Long Does a Low Budget Shed Base Last?
Many bases, when installed correctly, last ten years or more.
4. Do I need planning permission for a shed base?
Most small shed bases don’t require permission. Always check local rules.
5.Can a shed base be altered after installation?
Yes. Gravel and block bases allow easy adjustment over time.