You’ve found the perfect image—a intricate logo, a meaningful symbol, or a custom piece of art. You can already picture it stitched onto a bag, a cap, or a jacket with your Husqvarna Viking machine. But there’s a catch: your embroidery machine doesn’t speak the language of pixels. It requires a specialized set of instructions in a format it understands, like the HUS format. To bridge this gap, you need to find an effective way to perform a HUS file converter process, transforming a simple picture into a stitch-ready blueprint.
This translation from a static image to a dynamic embroidery file is both a technical process and an art form. While automated tools promise instant results, mastering this conversion ensures your final product is not just stitched, but crafted with quality and precision. This guide will walk you through the journey from a JPG to a HUS file, exploring the tools, techniques, and secrets to achieving professional results every time.
Understanding the Divide: JPG vs. HUS
Before you can master the conversion, it’s essential to understand the fundamental difference between these two file types. They are not simply different formats; they are different languages serving entirely different purposes.
-
JPG (or JPEG): This is a raster image file. Think of it as a digital mosaic made of millions of tiny, colored squares called pixels. It’s fantastic for displaying photographs and complex color gradients on a screen. However, it has no understanding of stitches, thread, or needle paths. The more you zoom in, the more blurry and pixelated it becomes.
-
HUS: This is a proprietary embroidery file format for Husqvarna Viking sewing and embroidery machines. It doesn’t contain pixels but is instead a sophisticated set of commands. A HUS file acts as a detailed recipe, telling your machine exactly where to move the needle, what type of stitch to form (satin, fill, running), when to trim the thread, and when to change colors.
Converting a JPG to a HUS file is the process of interpreting the colors and shapes in an image and translating them into this logical sequence of embroidery commands. The quality of this translation is what separates an amateurish mess from a professional-grade design.
The Conversion Toolbox: Your Methods Explained
You have several paths to convert your JPG into a HUS file. The best choice depends on your desired quality, budget, and willingness to learn.
1. Automated Online Converters (The Instant, But Risky, Path)
These web-based tools offer the fastest way to get a HUS file, often in just minutes.
How It Works: You upload your JPG to a converter website, select HUS as the output format, and the platform’s algorithm automatically generates a file for you to download.
Pros:
-
Speed: This is the quickest method, ideal for when you need a file immediately.
-
Ease of Use: Requires no technical knowledge or software installation.
-
Low Cost: Many platforms offer free conversions or low one-time fees.
Cons:
-
Poor Quality: This is the biggest drawback. Algorithms make guesses, leading to inefficient stitch paths, too many color changes, and messy outlines. Complex images and photos rarely convert well.
-
Zero Control: You cannot edit stitch types, density, or sequence. You get what you get.
-
Privacy Concerns: You are uploading your design to a third-party server.
Best For: Very simple, high-contrast graphics (like a bold logo) for personal, low-stakes projects.
2. Dedicated Embroidery Software (The Gold Standard for Quality)
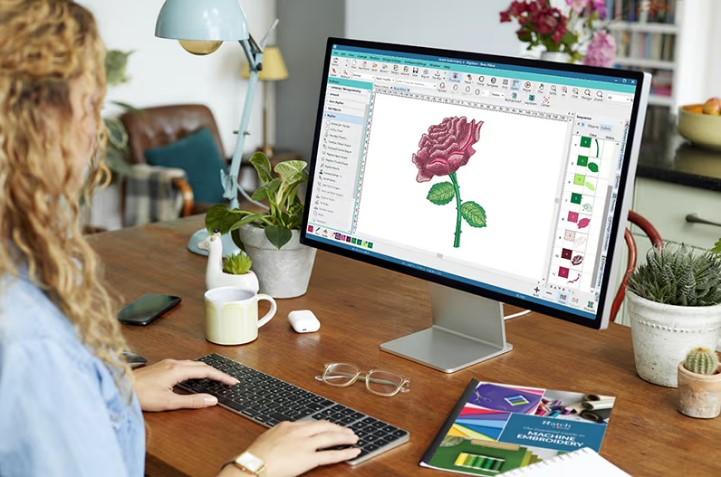
This method provides the highest quality and total creative control. Software like Hatch, Embrilliance, or PulseID allows for manual digitizing.
How It Works: You import your JPG into the software and use it as an underlay. Then, you manually trace the design, creating individual objects for each element. You assign stitch types (e.g., fill stitch for solid areas, satin stitch for borders), set stitch direction and density, and create a logical sewing order. Finally, you save or export the perfected design as a HUS file.
Pros:
-
Professional Results: Creates clean, efficient, and beautiful embroidery files optimized for your machine.
-
Complete Control: You decide every aspect of how the design will stitch out.
-
Editing Power: You can edit and perfect any design, not just ones you create.
Cons:
-
Steep Learning Curve: Digitizing is a skilled craft that takes time to master.
-
High Cost: Professional software requires a significant financial investment.
Best For: Serious hobbyists, small businesses, and anyone who demands professional, sellable quality.
3. Auto-Digitizing Features in Software (The Smart Middle Ground)
Many dedicated software programs offer an “Auto-Digitize” function, which serves as a powerful bridge between full manual control and fully automated online tools.
How It Works: You import your JPG and click a button like “Auto-Digitize” or “Quick Punch.” The software generates a stitch file from your image. The key advantage here is that you can then use the software’s tools to clean up, edit, and refine this auto-generated design before saving it as your final HUS file.
Pros:
-
Faster than Manual Digitizing: It gives you a huge head start.
-
Better Quality than Online Tools: Software algorithms are typically more advanced.
-
Editability: You can fix errors and improve the design, which is impossible with online converters.
Best For: Those who own software and want a good balance between speed and acceptable quality for simpler designs.
Preparing Your JPG for a Successful Conversion
Your choice of image is the most critical factor in getting a usable HUS file. A little preparation goes a long way.
-
Simplify Your Design: Choose images with clear, bold lines and solid colors. A simple graphic converts far better than a detailed photograph with gradients and shadows.
-
Maximize Contrast: Ensure your subject stands out starkly from the background. High contrast helps any converter distinguish between elements.
-
Remove the Background: Use a free tool like Canva, GIMP, or Remove.bg to delete the background. Save your image as a PNG with a transparent background. This prevents the software from trying to stitch a huge, unnecessary block of color.
-
Crop and Resize: Crop out any extra space and consider resizing the image to the approximate dimensions you want the final embroidery to be.
The Non-Negotiable Step: Test Stitching
Never, ever run your new HUS file on your final project fabric first. This is the most important rule in embroidery.
Always do a test stitch on a scrap piece of similar fabric. This will reveal any issues with density (puckering), thread breaks, color order, or design errors. It allows you to go back and adjust your digital file before potentially ruining your project.
Conclusion: From Pixels to Perfect Stitches
Mastering the conversion from JPG to HUS is about understanding that you are not just changing a file extension; you are translating a visual idea into a physical craft. While automated tools offer a tempting shortcut, they often lead to disappointing results.
For truly professional embroidery that does your original image justice, there is no substitute for the control offered by dedicated digitizing software. Whether you choose to learn the skill yourself or use software features to assist you, this path ensures your Husqvarna Viking machine can faithfully recreate your vision with every single stitch. Embrace the process, start with simple images, and enjoy the rewarding journey of turning digital pictures into tangible art.